Strawberry Cheesecake Dump Cake
Introduction
Delightfully rich and effortlessly simple, Strawberry Cheesecake Dump Cake is the ultimate treat for when you want decadent flavor with minimal fuss. By layering classic cheesecake ingredients and vibrant strawberry flavors in a single pan, this crowd-pleasing dessert offers all the satisfaction of a traditional cheesecake—without the lengthy preparation or complex techniques.
Ideal for parties, potlucks, or even weeknight cravings, this dump cake shines with its ease and irresistible appeal. Each bite is a celebration of juicy berries, creamy cheesecake, and a buttery, golden topping.
Why You’ll Love This Strawberry Cheesecake Dump Cake
This recipe brings together the lusciously creamy texture of cheesecake and the sweet tartness of strawberries for a dessert that’s both comforting and impressive. With each spoonful, you’ll get the perfect balance of flavors and textures: gooey fruit, velvety cream cheese, and a cakey, lightly crisp topping. Best of all, it takes mere minutes to assemble with accessible ingredients found at almost any supermarket.
The Secret to Creamy Cheesecake Layers
The combination of cream cheese and sweetened condensed milk is what gives this dump cake its signature silky richness. For the smoothest result, ensure your cream cheese is fully softened before mixing. Achieve a lump-free blend in moments using the [Ninja BL610 Professional 72 Oz Countertop Blender, Black](https://amzn.to/3XGbj4i), which guarantees a flawless, velvety texture to evenly ripple through your cake.
How to Dump and Layer Flavors Like a Pro
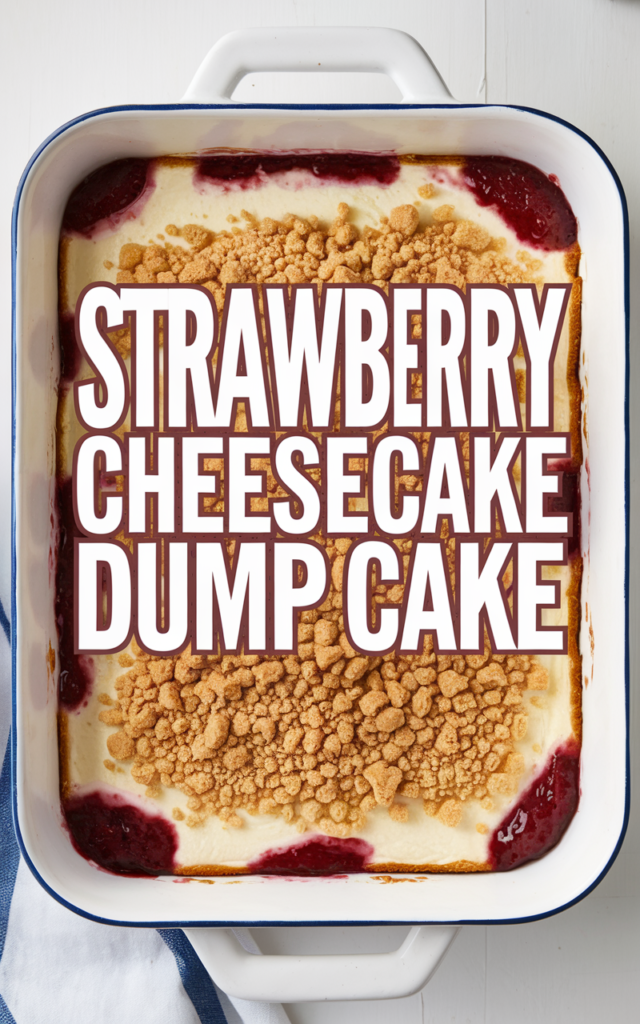
The magic of dump cake is in the layering. First, a foundation of strawberry pie filling brings fruity boldness. Then, dollops of sweetened cream cheese add tangy depth, and a box of cake mix forms an irresistible topping. Finally, a drizzle of melted butter brings it all together—resulting in golden, buttery perfection after baking.
There’s no need for mixing bowls or fancy tools. Simply “dump” each component straight into your baking dish, spreading each gently for even coverage.
Finishing Touches and Serving Ideas
After baking, let your dump cake cool for at least 15 minutes to enhance its flavors and set the layers. For a showstopping finish, serve each scoop with a swirl of fresh whipped cream and an extra handful of sliced strawberries. Want to go all out? Add a sprinkle of graham cracker crumbs or a drizzle of strawberry sauce.
If sharing at a picnic or potluck, a [Pureegg Plastic Table Cloth Disposable 10 Pack, White](https://amzn.to/42q9Bq9) keeps serving areas tidy and looking festive.
Nutritional Information and Serving Size
This recipe yields about 10 servings. Each portion averages 350–400 calories, depending on toppings—just right for a sweet, indulgent finale to any meal.
Strawberry Cheesecake Dump Cake (Recap)
With flavors reminiscent of your favorite berry cheesecake and a prep time that’s hard to beat, this Strawberry Cheesecake Dump Cake is perfect for bakers of any skill level or anyone needing a quick, delicious dessert.
Ingredients
Instructions
- Preheat your oven to 350°F. Grease a 9×13-inch baking dish, or line it with a sheet of Reynolds Kitchens Brown Parchment Paper Roll for easy cleanup and seamless serving.
- Spread both cans of strawberry pie filling evenly over the bottom of your prepared dish.
- In a separate bowl (or your blender for maximum smoothness), mix the softened cream cheese with sweetened condensed milk until creamy and lump-free. Dollop this mixture over the strawberry layer, spreading gently but leaving some swirls for contrast.
- Sprinkle the dry cake mix evenly over the entire surface—do not stir.
- Drizzle the melted butter as evenly as possible over the cake mix, covering as much as you can to ensure a golden topping.
- Bake for 35–40 minutes or until the cake mix is golden brown and the edges are bubbling.
- Cool for at least 15 minutes, then serve warm or at room temperature with desired toppings.
Cook and Prep Times
Prep Time: 10 minutes
Cook Time: 40 minutes
Total Time: 50 minutes